
Escherichia coli (E. coli) bacteria normally live in the intestines of healthy people and animals. Most types of E. coli are harmless or cause relatively brief diarrhea.
The best culture media for E. coli…
‘Lysogeny’ or Luria broth (LB) is the most commonly used growth medium for E. coli.
Media is used to test for E. coli..
EC broth and agar media with MUG is best suited for confirmatory testing of the presence of E. coli after a presumptive positive result for fecal coliform bacteria. The enzyme ß-glucuronidase (GUD) was first recognized in E. coli by Buehler et al.
Minimal Plates
Autoclave 15 g agar in 800 ml water for 15 min. Add sterile concentrated minimal medium and carbon source. After medium has cooled to about 50°C, add supplements and antibiotics. Pouring 32 to 40 ml medium into each plate, expect about 25 to 30 plates per liter.
How do you take E. coli samples?
We recommend swabbing an area of 10 cm x 10 cm (i.e., 100 cm2). After swabbing insert the swab in the sterile tube and ensure it is properly capped. Mark the swab with an identification number or code and record date and the sampling point. If taking more samples repeat the procedure.
All the Basic Protocols described in this unit should not take more than a few minutes each, aside from the time required to grow the bacteria overnight (e.g., 12 to 20 hr).
The detection of E. coli in drinking water indicates fecal contamination and therefore that fecal pathogens may be present which can pose a health risk to consumers
Of the five general groups of bacteria that comprise the total coliforms, only E. coli is generally not found growing and reproducing in the environment. Consequently, E. coli is considered to be the species of coliform bacteria that is the best indicator of fecal pollution and the possible presence of pathogens.
The watery diarrhea lasts for about a day and then may change to bright red bloody stools. The infection makes sores in your intestines, so the stools become bloody. The bloody diarrhea may last for 2 to 5 days. You might have 10 or more bowel movements a day..
As stools infected with enteropathogenic E coli also have a characteristic smell, it may be that other organisms causing diarhoea may also be identified by smell.
.
Plasmids can carry one or more antibiotic resistance genes, which confer resistance to a specific antibiotic to the bacteria carrying them. The presence of an antibiotic resistance gene on a plasmids allows researchers to easily isolate bacteria containing that plasmid from bacteria that do not contain it by artificial selection (i.e. growing the bacteria in the presence of the antibiotic).
Luria broth (LB) is a nutrient-rich media commonly used to culture bacteria in the lab. LB agar plates are frequently used to isolate individual (clonal) colonies of bacteria carrying a specific plasmid. However, a liquid culture is capable of supporting a higher density of bacteria and is used to grow up sufficient numbers of bacteria necessary to isolate enough plasmid DNA for experimental use. The following protocol is for inoculating an overnight culture of liquid LB with bacteria.
Protocol
- Prepare liquid LB. For example, to make 400 mL of LB, weigh out the following into a 500 mL glass bottle:
- 4 g NaCl
- 4 g Tryptone
- 2 g Yeast Extract
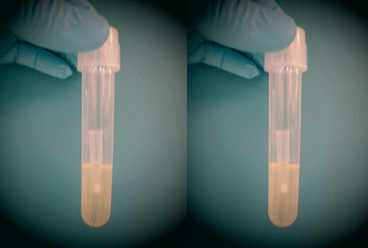
- and dH2O to 400 mLNote: If your lab has pre-mixed LB agar powder, use the suggested amount, instead of the other dry ingredients above.Media without growth (top) and with growth (bottom)

 Loosely close the cap on the bottle (do NOT close all the way or the bottle may explode!) and then loosely cover the entire top of the bottle with aluminum foil. Autoclave and allow to cool to room temperature. Now screw on the top of the bottle and store the LB at room temperature.
- When ready to grow your culture, add liquid LB to a tube or flask and add the appropriate antibiotic to the correct concentration (see table below). Note: If you intend to do a mini-prep you will usually want to start 2 mL in a falcon tube, but for larger preps you might want to use as much as a liter of LB in a 2 L Erlenmeyer flask.
- Using a sterile pipette tip or toothpick, select a single colony from your LB agar plate.
- Drop the tip or toothpick into the liquid LB + antibiotic and swirl.
- Loosely cover the culture with sterile aluminum foil or a cap that is not air tight.
- Incubate bacterial culture at 37°C for 12-18 hr in a shaking incubator. Note: Some plasmids or strains require growth at 30°C. If so, you will likely need to grow for a longer time to get the correct density of bacteria since they will grow more slowly at lower temperatures.
- After incubation, check for growth, which is characterized by a cloudy haze in the media (see right). Note: Some protocols require bacteria to be in the log phase of growth. Check the instructions for your specific protocol and conduct an OD600 to measure the density of your culture if needed. Note: A good negative control is LB media + antibiotic without any bacteria inoculated. You should see no growth in this culture after overnight incubation.
- (Optional) For long term storage of the bacteria, you can proceed with Creating a Glycerol Stock.
- You can now isolate your plasmid DNA from the bacterial culture by following Isolating your Plasmid DNA.
Antibiotic Concentrations
| Commonly Used Antibiotics | Recommended Concentration |
|---|---|
| Ampicillin | 100 µg/mL |
| Bleocin | 5 µg/mL |
| Carbenicillin | 100 µg/mL |
| Chloramphenicol | 25 µg/mL |
| Coumermycin | 25 µg/mL |
| Gentamycin | 10 µg/mL |
| Kanamycin | 50 µg/mL |
| Spectinomycin | 50 µg/mL |
| Tetracycline | 10 µg/mL |
Tips and FAQ

- What is the difference between high copy and low copy plasmids? The copy number refers to the number of copies of an individual plasmid within a single bacterial cell. Large plasmids usually have a low copy number (approximately one or two copies per cell) and they need to grow for longer periods of time (approximately 18-30 hr). On the other hand, smaller plasmids can be present in large numbers, 50 or more per cell and have a high copy number. High copy number plasmids should only need to be grown for 12-16 hr on average. Certain features of a plasmid may render it low copy regardless of plasmid size. See the plasmid’s info page to determine if your plasmid is high or low copy.
- I didn’t get any growth after overnight incubation. What went wrong? Try growing the culture for more time. Some bacterial cultures grow more slowly. Also, bacteria incubated at 30°C rather than 37°C often require longer incubation times. Double check that the antibiotic in your LB media matches the antibiotic resistance on your plasmid. If the bacteria on your LB agar plates are not fresh, you should streak your bacteria onto a new LB agar plate before growing in liquid culture. More aeration may help to increase the density of the culture. Normally cultures shake at 150 – 250 rpm, increase this to 350 – 400 rpm to obtain a higher cell density.
.,
Streaking and Isolating Bacteria on an LB Agar Plate
Introduction
If you have a glycerol stock or stab culture of bacteria and need to purify plasmid DNA from it, you will want to isolate an individual clonal population (single colony) of bacteria from this stock. Using a single colony from a freshly streaked agar plate to inoculate a bacterial culture for DNA purification will minimize the chance of having a mixture of plasmids in your purified DNA. This protocol explains how to isolate a single bacterial colony by streaking it onto an LB agar plate.
Equipment
- Sterile toothpicks or wire loop
- Bunsen burner (or other small flame source)
- Incubator
- Marker
 Reagents
- LB agar plate (with appropriate antibiotic)
- Bacterial stab
Procedure


- Obtain an LB agar plate with appropriate antibiotic.
- Label the bottom of the plate with the plasmid name and the date. It is also a good idea to add the antibiotic resistance and your initials. Labeling within a laboratory setting is important for organization, and it is recommended that you keep a standard labeling system for all your objects/solutions.
- Sterilize your lab bench by spraying it down with 70% ethanol and wiping it down with a paper towel. Maintain sterility by working near a flame or Bunsen burner.
- Obtain the approrpriate bacterial stab or glycerol stock.
- Using a sterile loop, pipette tip or toothpick, touch the bacteria growing within the punctured area of the stab culture or the top of the glycerol stock.
 *Pro-Tip* If you use a wire loop you can sterilize it by passing it through a flame, just be sure to allow enough time for the loop to cool before touching it to the bacteria.
 - Gently spread the bacteria over a section of the plate, as shown in the diagram above, to create streak #1.*Pro-Tip* Hold your tooth pick at an angle, the way you would hold a pencil, so that you can make a broad stroke. Only touch the surface of the plate, do NOT dig into the agar.*Pro-Tip* Another very popular technique is to draw in discontinuous lines. Start by streaking a vertical line of bacteria along one edge of the plate. Then streak horizontal lines in another section of the plate, and then diagonal lines in another section of the plate. Make sure that the first line (and only the first) in each new section crosses at least one line of the previous section so that it will contain some bacteria.
- Using a fresh, sterile toothpick, or freshly sterilized loop, drag through streak #1 and spread the bacteria over a second section of the plate, to create streak #2.
- Using a third sterile pipette tip, toothpick, or sterilized loop, drag through streak #2 and spread the bacteria over the last section of the plate, to create streak #3.
- Incubate plate with newly plated bacteria overnight (12-18 hours) at 37 °C.*Pro-Tip* Some plasmids or bacteria need to be grown at 30 °C instead of 37 °C. This is often true for large unstable plasmids, which sometimes recombine at 37 °C. Be sure to check this before incubating your plate.
- In the morning, single colonies should be visible. A single colony should look like a white dot growing on the solid medium. This dot is composed of millions of genetically identical bacteria that arose from a single bacterium. If the bacterial growth is too dense and you do not see single colonies, re-streak onto a new agar plate to obtain single colonies.
- Once you have single colonies, you can proceed to Recovering Plasmid DNA or use the individual colonies for other experiments.
.
.
Recovering Plasmid DNA from Bacterial Culture
Introduction
Many molecular biology techniques require highly purified and concentrated plasmid DNA. This page will discuss the general procedure for purifying plasmid DNA from bacterial culture. For details on how to streak a plate to get individual colonies and to generate liquid bacterial cultures, please see those pages.
Several companies, such as Qiagen, Invitrogen, and Promega sell kits for isolating plasmid DNA in quantities as low as a few micrograms to as much as several miligrams and at concentrations ranging from 150 ng/μL to several μg/μL. The protocol below is meant to describe the general procedure for purifying plasmid DNA from bacterial cultures. If you will be using a kit, follow the kit’s instructions. If you want to perform plasmid purification without using a kit, you can find a protocol for kit-free plasmid mini-prep at the bottom of this page.
Last Update: Feb. 8, 2018
 Equipment
- Desktop microcentrifuge
- Desktop vortexer
- Vacuum (optional)
Reagents
- Overnight culture of bacteria transformed with your plasmid
- Resuspension buffer
- Denaturing solution
- Renaturing solution
- 2 mg/mL RNase A
- TE or water-saturated phenol-chloroform
- Chloroform
- 100% ethanol or isopropanol
- 90% ethanol
- 70% ethanol
- TE buffer
- 3 M Na-acetate (pH 4.8)
Protocol: Generalized DNA Purification
- Grow an overnight culture of bacteria.*Pro-Tip* Refer to appropriate DNA prep protocol for volume of bacteria to grow (low copy plasmids require larger cultures).
- Centrifuge the culture to pellet the bacteria before proceeding with DNA preparation.*Pro-Tip* If your entire overnight culture cannot fit into a single centrifuge tube, aliquot it into several tubes/bottles.
- Remove the supernatant and resuspend the bacteria in buffer. Note: This step gets all of the bacteria back into suspension, but within a smaller volume of buffer that is compatible with the next solution.
- Add a denaturing solution to the resuspended bacteria. Note: This step causes the bacteria to lyse, releasing their contents, including plasmid DNA, into solution.
- Add a renaturing solution to the denatured bacteria. Note: This step brings the pH back down causing the proteins and genomic DNA to precipitate, while leaving the smaller plasmids free in solution.
- Pellet the proteins and genomic DNA by centrifugation, and remove the plasmid-containing supernatant.
- Add either ethanol or isopropanol to precipitate the plasmid DNA.
- Either spin to pellet the DNA or apply the solution to a column that will bind the now precipitated DNA.
- Wash the pellet or column with 70% ethanol to remove excess salt.
- Resuspend the DNA pellet, or elute the DNA off of the column using water or a neutral buffer such as TE.
You will now have plasmid DNA that has been purified away from the bacterial proteins and genomic DNA. Depending on the method used, the DNA concentration and purity will vary. For more information on determining DNA concentration and purity
.
Protocol: Kit-free Alkaline Lysis Plasmid Miniprep
- Prepare the following solutions:
- Solution I – Resuspension Buffer
- 25 mm Tris-HCl (pH 8)
- 50 mm glucose
- 10 mm EDTA Store Solution I at 4°C
- Solution II – Denaturing Solution
- 0.2 N NaOH
- 1.0% SDS Store Solution II at room temperature
- Solution III – Renaturing Solution (Potassium Acetate)
- 120 mL 5M Potassium acetate
- 23 mL glacial acetic acid
- 57 mL of dH2OStore Solution III at 4°C
- Solution I – Resuspension Buffer
- Grow 2 mL overnight cultures from single colonies of bacteria containing your plasmid of interest.
- Add 1.5 mL of the stock culture to a 1.75 mL microfuge tube.
- Centrifuge in microfuge tube at 10,000 g for 30 sec.
- Pour off the supernatant, being careful not to disturb the bacterial pellet.
- Resuspend the pellet in 100 μL of cold Solution I.
- Vortex the solution for 2 min or until all bacteria are fully resuspended.
- Add 200 μL of Solution II and invert the tube carefully 5 times to mix the contents. The contents will become clear and thicker as the proteins and DNA are denatured.*Pro-Tip* Do not vortex at this stage or the genomic DNA will become sheared and will therefore contaminate your purified plasmid DNA.
- Incubate solution on ice for 5 min.
- Add 150 μL of cold Solution III to each tube.
- Mix by inverting several times. A white precipitate will be formed which contains the bacterial proteins and genomic DNA.
- Incubate tube on ice for 5 min.
- Centrifuge the tube for 5 min at 12,000 g. Note: Pellet contains proteins, cell fragments, salt and other extra particles from solutions. Note: Supernatant contains the plasmid DNA separated from bacterial chromosomes.
- Collect the supernatant into a new tube by pipetting or carefully pouring.
- (Optional) Add 5 μL of 2 mg/mL RNase A to the supernatant in the new tube and incubate at 37 °C for 5 min. Note: Ribonuclease A (RNase A) is a pancreatic ribonuclease that digests single-stranded RNA.
- (Optional) Perform phenol-chloroform extraction – see protocol below. Note: Phenol-chloroform extraction removes remaining contaminant proteins and RNase A from the DNA sample. When phenol is mixed with the aqueous solution containing DNA, proteins will move into the phenol phase and will be separated from the aqueous DNA.
- Add either 700 μL of cold 100% ethanol or 350 μL room temperature isopropanol to the solution to precipitate the plasmid DNA; see detailed protocol below .*Pro-Tip* If precipitating with ethanol, it is often thought that an incubation of 20 min to overnight at -20 °C or -80 °C will improve precipitation.
- Pour out the supernatant.
- (Optional) Wash the pellet with 70% ethanol. Note: This step removes excess salt from the pellet which can cause problems with some common reactions.
- Air dry the pellet (can be done by inverting the tube at an angle over Kim wipe) for 20-30 min.
- Resuspend pellet with 25-50 μL of TE.
.
Protocol: Phenol-Chloroform Extraction of DNA Samples
- Add an equal volume of TE-saturated phenol-chloroform to the aqueous DNA sample.*Pro-Tip* Water-saturated phenol-chloroform can be used if TE-saturated is not available.
- Vortex microfuge tube for 30-60 sec.
- Centrifuge the tube for 5 min at room temperature on the highest setting. Note: You should see clearly separated layers:
- Top Phase – Aqueous DNA phase
- Middle phase – A white layer may appear, consisting of precipitated protein particles
- Bottom phase – Organic phase (protein)
- Pipet the aqueous DNA layer and place it in a new microfuge tube.
- Add equal volume of chloroform to the recovered aqueous DNA layer.
- Repeat steps 2-4.Note: Phenol-chloroform is a hazardous waste – DO NOT pour down sink.
.
Protocol: Ethanol Precipitation
- To your DNA solution, add 2-2.5 volumes 95% or 100% ethanol and 1/10 volume of 3 M Na-acetate (pH 4.8).
- Invert the microfuge tube to mix.
- (Optional) Place the tube either at -20 °C overnight OR -80 °C for 30 min OR on dry ice for 5 min.Note: This freezing may help the DNA to precipitate.
- Centrifuge solution at high speed (at least 12,000 rpm) for 15-30 min at 4°C.Note: Pellet contains the precipitated DNA.Note: Supernatant contains residues, salts, and water.
- Pour out the supernatant in the sink.
- Open and invert the tubes on a paper towel to drain them out.
- Wash pellet by adding 500 µL cold 70% ethanol.Note: This helps to remove excess salt from the DNA pellet.
- Centrifuge solution at high speed (at least 12,000 rpm) for 5 min at room temp.
- Pour out the supernatant in the sink.*Pro-Tip* Be careful, the pellet is harder to see and less well attached to the tube after the 70% ethanol wash. You can also pipet the supernatant out of the tube if you are worried about losing the pellet.
- Dry with vacuum or by inverting over paper towel for 5-20 min.
- Resuspend dry DNA with TE (10 mM Tris-HCl pH 8, 0.1 mM EDTA).*Pro-Tip* DNA resuspension can take time, it is a good idea to let it sit for several hours to overnight at room temperature before quantifying and using.
- Store DNA at 4°C.
Tips and FAQ
- Plasmid purification kits provide the fastest way to obtain a high concentration of clean plasmid DNA. To improve the purity of plasmid DNA purified without a kit it is advisable to perform a phenol/chloroform extraction of the supernatant after step 6 and before step 7. This will help to remove proteins and other contaminants from the plasmid DNA.
- It is also advisable to add RNAse to the supernatant after step 6 to eliminate RNA contamination. This is included in the resuspension buffer of most kits.
.
.
.
Recovering Plasmid DNA from Bacterial Culture
.
.
.
Introduction
Many molecular biology techniques require highly purified and concentrated plasmid DNA. This page will discuss the general procedure for purifying plasmid DNA from bacterial culture. For details on how to streak a plate to get individual colonies and to generate liquid bacterial cultures, please see those pages.
Several companies, such as Qiagen, Invitrogen, and Promega sell kits for isolating plasmid DNA in quantities as low as a few micrograms to as much as several miligrams and at concentrations ranging from 150 ng/μL to several μg/μL. The protocol below is meant to describe the general procedure for purifying plasmid DNA from bacterial cultures. If you will be using a kit, follow the kit’s instructions. If you want to perform plasmid purification without using a kit, you can find a protocol for kit-free plasmid mini-prep at the bottom of this page.
Last Update: Feb. 8, 2018
Equipment
- Desktop microcentrifuge
- Desktop vortexer
- Vacuum (optional)
Reagents
- Overnight culture of bacteria transformed with your plasmid
- Resuspension buffer
- Denaturing solution
- Renaturing solution
- 2 mg/mL RNase A
- TE or water-saturated phenol-chloroform
- Chloroform
- 100% ethanol or isopropanol
- 90% ethanol
- 70% ethanol
- TE buffer
- 3 M Na-acetate (pH 4.8)
Protocol: Generalized DNA Purification
- Grow an overnight culture of bacteria.*Pro-Tip* Refer to appropriate DNA prep protocol for volume of bacteria to grow (low copy plasmids require larger cultures).
- Centrifuge the culture to pellet the bacteria before proceeding with DNA preparation.*Pro-Tip* If your entire overnight culture cannot fit into a single centrifuge tube, aliquot it into several tubes/bottles.
- Remove the supernatant and resuspend the bacteria in buffer.Note: This step gets all of the bacteria back into suspension, but within a smaller volume of buffer that is compatible with the next solution.
- Add a denaturing solution to the resuspended bacteria.Note: This step causes the bacteria to lyse, releasing their contents, including plasmid DNA, into solution.
- Add a renaturing solution to the denatured bacteria.Note: This step brings the pH back down causing the proteins and genomic DNA to precipitate, while leaving the smaller plasmids free in solution.
- Pellet the proteins and genomic DNA by centrifugation, and remove the plasmid-containing supernatant.
- Add either ethanol or isopropanol to precipitate the plasmid DNA.
- Either spin to pellet the DNA or apply the solution to a column that will bind the now precipitated DNA.
- Wash the pellet or column with 70% ethanol to remove excess salt.
- Resuspend the DNA pellet, or elute the DNA off of the column using water or a neutral buffer such as TE.
You will now have plasmid DNA that has been purified away from the bacterial proteins and genomic DNA. Depending on the method used, the DNA concentration and purity will vary. For more information on determining DNA concentration and purity .
.
.
.
Protocol: Kit-free Alkaline Lysis Plasmid Miniprep
- Prepare the following solutions:
- Solution I – Resuspension Buffer
- 25 mm Tris-HCl (pH 8)
- 50 mm glucose
- 10 mm EDTA Store Solution I at 4°C
- Solution II – Denaturing Solution
- 0.2 N NaOH
- 1.0% SDS Store Solution II at room temperature
- Solution III – Renaturing Solution (Potassium Acetate)
- 120 mL 5M Potassium acetate
- 23 mL glacial acetic acid
- 57 mL of dH2OStore Solution III at 4°C
- Solution I – Resuspension Buffer
- Grow 2 mL overnight cultures from single colonies of bacteria containing your plasmid of interest.
- Add 1.5 mL of the stock culture to a 1.75 mL microfuge tube.
- Centrifuge in microfuge tube at 10,000 g for 30 sec.
- Pour off the supernatant, being careful not to disturb the bacterial pellet.
- Resuspend the pellet in 100 μL of cold Solution I.
- Vortex the solution for 2 min or until all bacteria are fully resuspended.
- Add 200 μL of Solution II and invert the tube carefully 5 times to mix the contents. The contents will become clear and thicker as the proteins and DNA are denatured.*Pro-Tip* Do not vortex at this stage or the genomic DNA will become sheared and will therefore contaminate your purified plasmid DNA.
- Incubate solution on ice for 5 min.
- Add 150 μL of cold Solution III to each tube.
- Mix by inverting several times. A white precipitate will be formed which contains the bacterial proteins and genomic DNA.
- Incubate tube on ice for 5 min.
- Centrifuge the tube for 5 min at 12,000 g. Note: Pellet contains proteins, cell fragments, salt and other extra particles from solutions. Note: Supernatant contains the plasmid DNA separated from bacterial chromosomes.
- Collect the supernatant into a new tube by pipetting or carefully pouring.
- (Optional) Add 5 μL of 2 mg/mL RNase A to the supernatant in the new tube and incubate at 37 °C for 5 min. Note: Ribonuclease A (RNase A) is a pancreatic ribonuclease that digests single-stranded RNA.
- (Optional) Perform phenol-chloroform extraction – see protocol below. Note: Phenol-chloroform extraction removes remaining contaminant proteins and RNase A from the DNA sample. When phenol is mixed with the aqueous solution containing DNA, proteins will move into the phenol phase and will be separated from the aqueous DNA.
- Add either 700 μL of cold 100% ethanol or 350 μL room temperature isopropanol to the solution to precipitate the plasmid DNA; see detailed protocol .*Pro-Tip* If precipitating with ethanol, it is often thought that an incubation of 20 min to overnight at -20 °C or -80 °C will improve precipitation.
- Pour out the supernatant.
- (Optional) Wash the pellet with 70% ethanol. Note: This step removes excess salt from the pellet which can cause problems with some common reactions.
- Air dry the pellet (can be done by inverting the tube at an angle over kimwipe) for 20-30 min.
- Resuspend pellet with 25-50 μL of TE.
Protocol: Phenol-Chloroform Extraction of DNA Samples
- Add an equal volume of TE-saturated phenol-chloroform to the aqueous DNA sample.*Pro-Tip* Water-saturated phenol-chloroform can be used if TE-saturated is not available.
- Vortex microfuge tube for 30-60 sec.
- Centrifuge the tube for 5 min at room temperature on the highest setting.Note: You should see clearly separated layers:
- Top Phase – Aqueous DNA phase
- Middle phase – A white layer may appear, consisting of precipitated protein particles
- Bottom phase – Organic phase (protein)
- Pipet the aqueous DNA layer and place it in a new microfuge tube.
- Add equal volume of chloroform to the recovered aqueous DNA layer.
- Repeat steps 2-4.Note: Phenol-chloroform is a hazardous waste – DO NOT pour down sink.
.
Protocol: Ethanol Precipitation
- To your DNA solution, add 2-2.5 volumes 95% or 100% ethanol and 1/10 volume of 3 M Na-acetate (pH 4.8).
- Invert the microfuge tube to mix.
- (Optional) Place the tube either at -20 °C overnight OR -80 °C for 30 min OR on dry ice for 5 min. Note: This freezing may help the DNA to precipitate.
- Centrifuge solution at high speed (at least 12,000 rpm) for 15-30 min at 4°C. Note: Pellet contains the precipitated DNA. Note: Supernatant contains residues, salts, and water.
- Pour out the supernatant in the sink.
- Open and invert the tubes on a paper towel to drain them out.
- Wash pellet by adding 500 µL cold 70% ethanol. Note: This helps to remove excess salt from the DNA pellet.
- Centrifuge solution at high speed (at least 12,000 rpm) for 5 min at room temp.
- Pour out the supernatant in the sink.*Pro-Tip* Be careful, the pellet is harder to see and less well attached to the tube after the 70% ethanol wash. You can also pipet the supernatant out of the tube if you are worried about losing the pellet.
- Dry with vacuum or by inverting over paper towel for 5-20 min.
- Resuspend dry DNA with TE (10 mm Tris-HCl pH 8, 0.1 mm EDTA).*Pro-Tip* DNA resuspension can take time, it is a good idea to let it sit for several hours to overnight at room temperature before quantifying and using.
- Store DNA at 4°C.
Tips and FAQ
- Plasmid purification kits provide the fastest way to obtain a high concentration of clean plasmid DNA. To improve the purity of plasmid DNA purified without a kit it is advisable to perform a phenol/chloroform extraction of the supernatant after step 6 and before step 7. This will help to remove proteins and other contaminants from the plasmid DNA.
- It is also advisable to add RNAse to the supernatant after step 6 to eliminate RNA contamination. This is included in the resuspension buffer of most kits.